This was my second project at TGA where we had the requirement to choose a third-person game as a reference.
We went with Resident Evil.
I learned a lot on this project and I am surprised that I had so much fun as I wasn’t too happy with our choice at first. Now I realize that it does not really matter what I work on I will find fun and exciting stuff to create.
During this project, I was in charge of
- Player VFX
- UI/Menu Shaders
- Growth Vertex Shader
- Card readers
- Screens
During this project, we worked with a custom engine, made by another of TGA´s groups, which in itself gave us a lot of weird problems that we had to figure out how to solve.
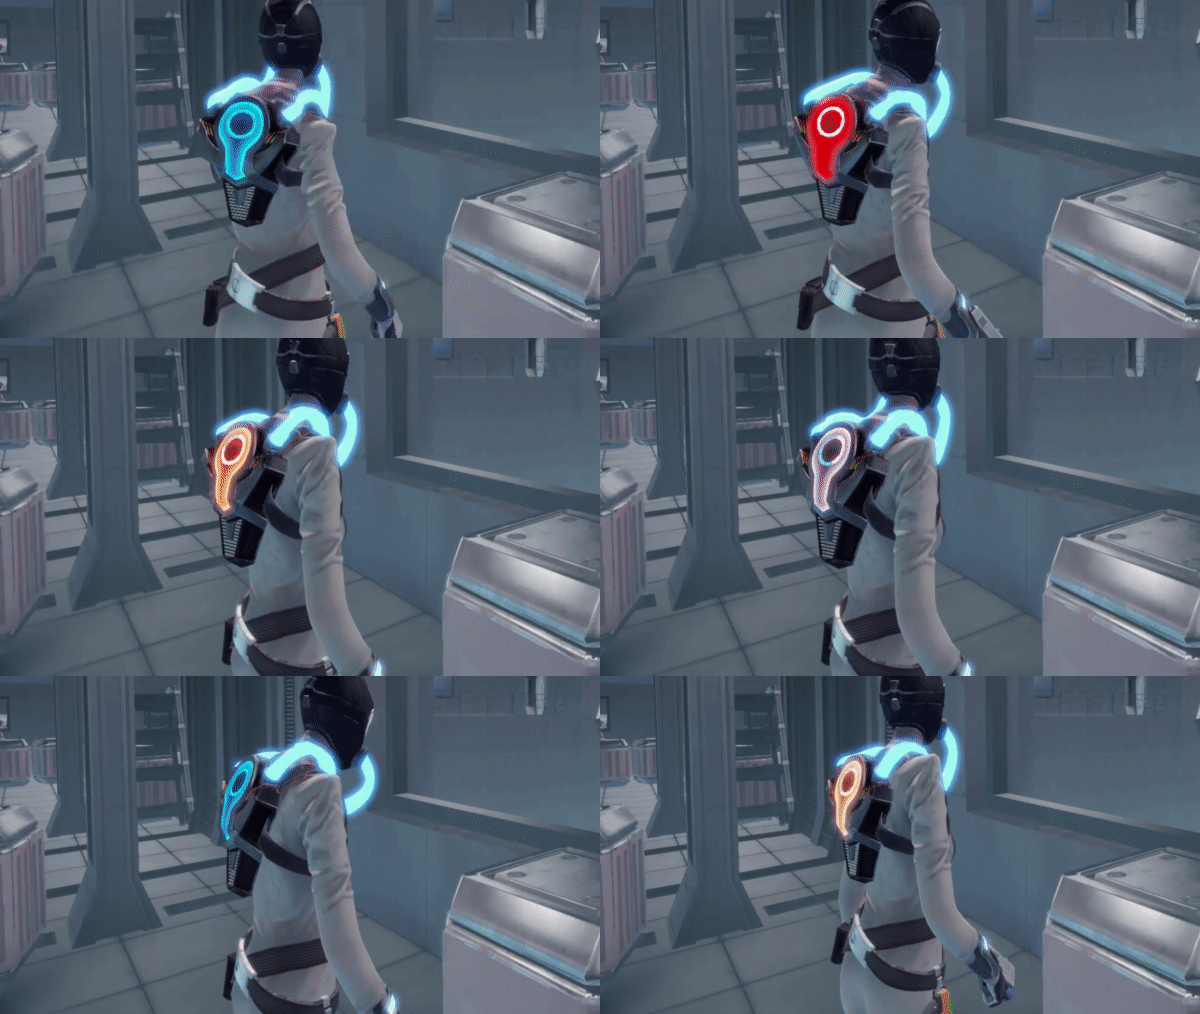
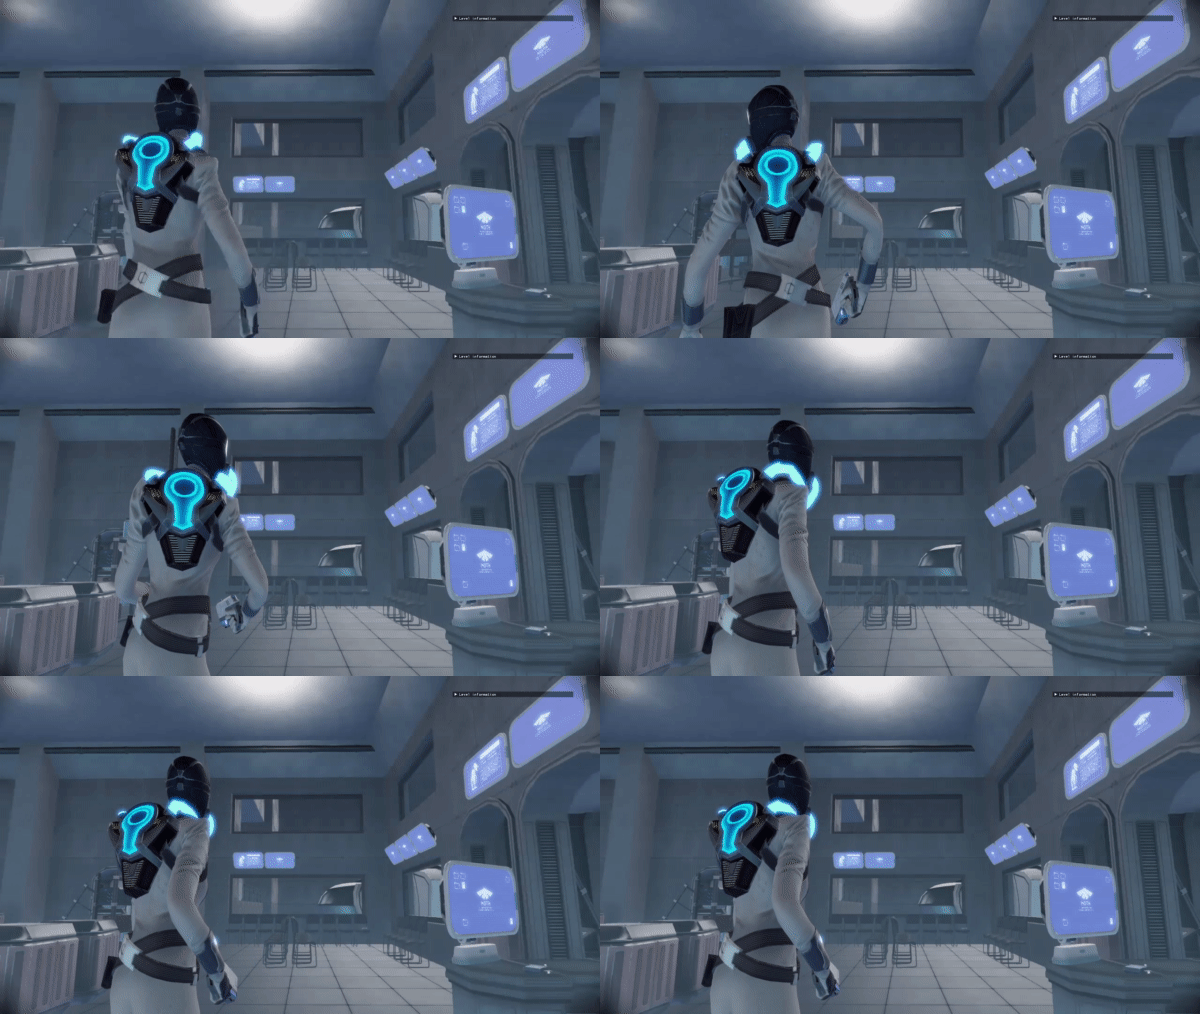
- Backpack Shader in-game (Slide One)
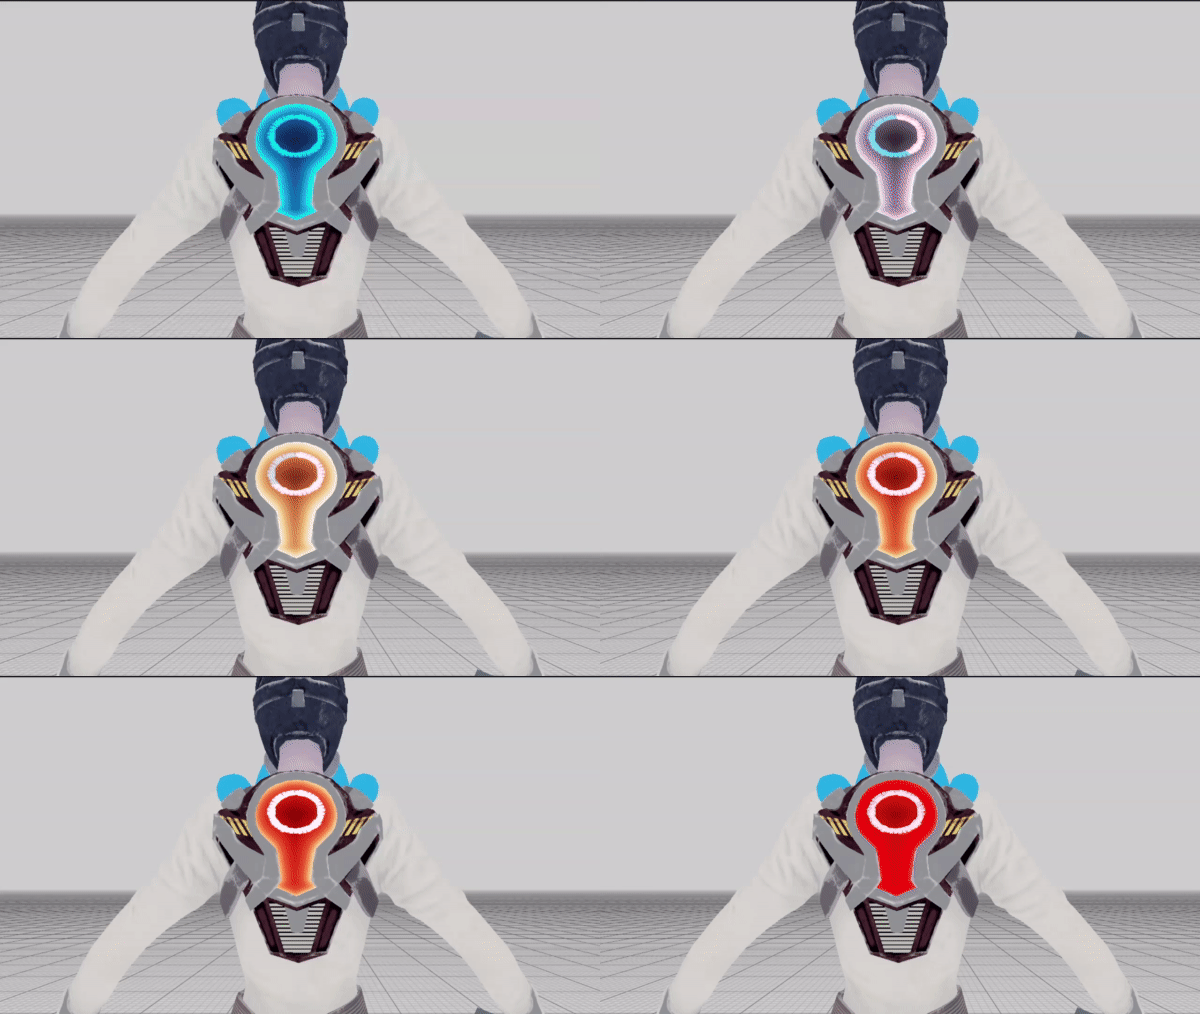
- Backpack Shader in Editor (Slide Two)
Our character had a display on her backpack, this felt obvious that it would have to show the player’s health. and I took this challenge upon myself.
and I loved, creating a shader where one parameter affects everything! was a ton of fun. I made this shader by throwing out a health parameter and an inverted health parameter to lerp between colors, effects, and more. by using Power I managed to give a steeper curve so that extra effects such as the screen flashing appears when reaching 50% health.
For the health bar itself, I made a mask that rotated with the health variable and multiplied it with a pattern made in Substance Designer.
This shader had to be attached to the player’s character without interfering with our artist’s textures so I solved this by utilizing vertex colors to mask out the display and then I added that in the alpha of a lerp. I played around with a separate UV channel but our engine did not support that.
UI IS FUN! Who would have known? During this project, I was in charge of enhancing the UI with some shaders. I made a menu background shader, a death screen, and also a loading screen (not yet added).
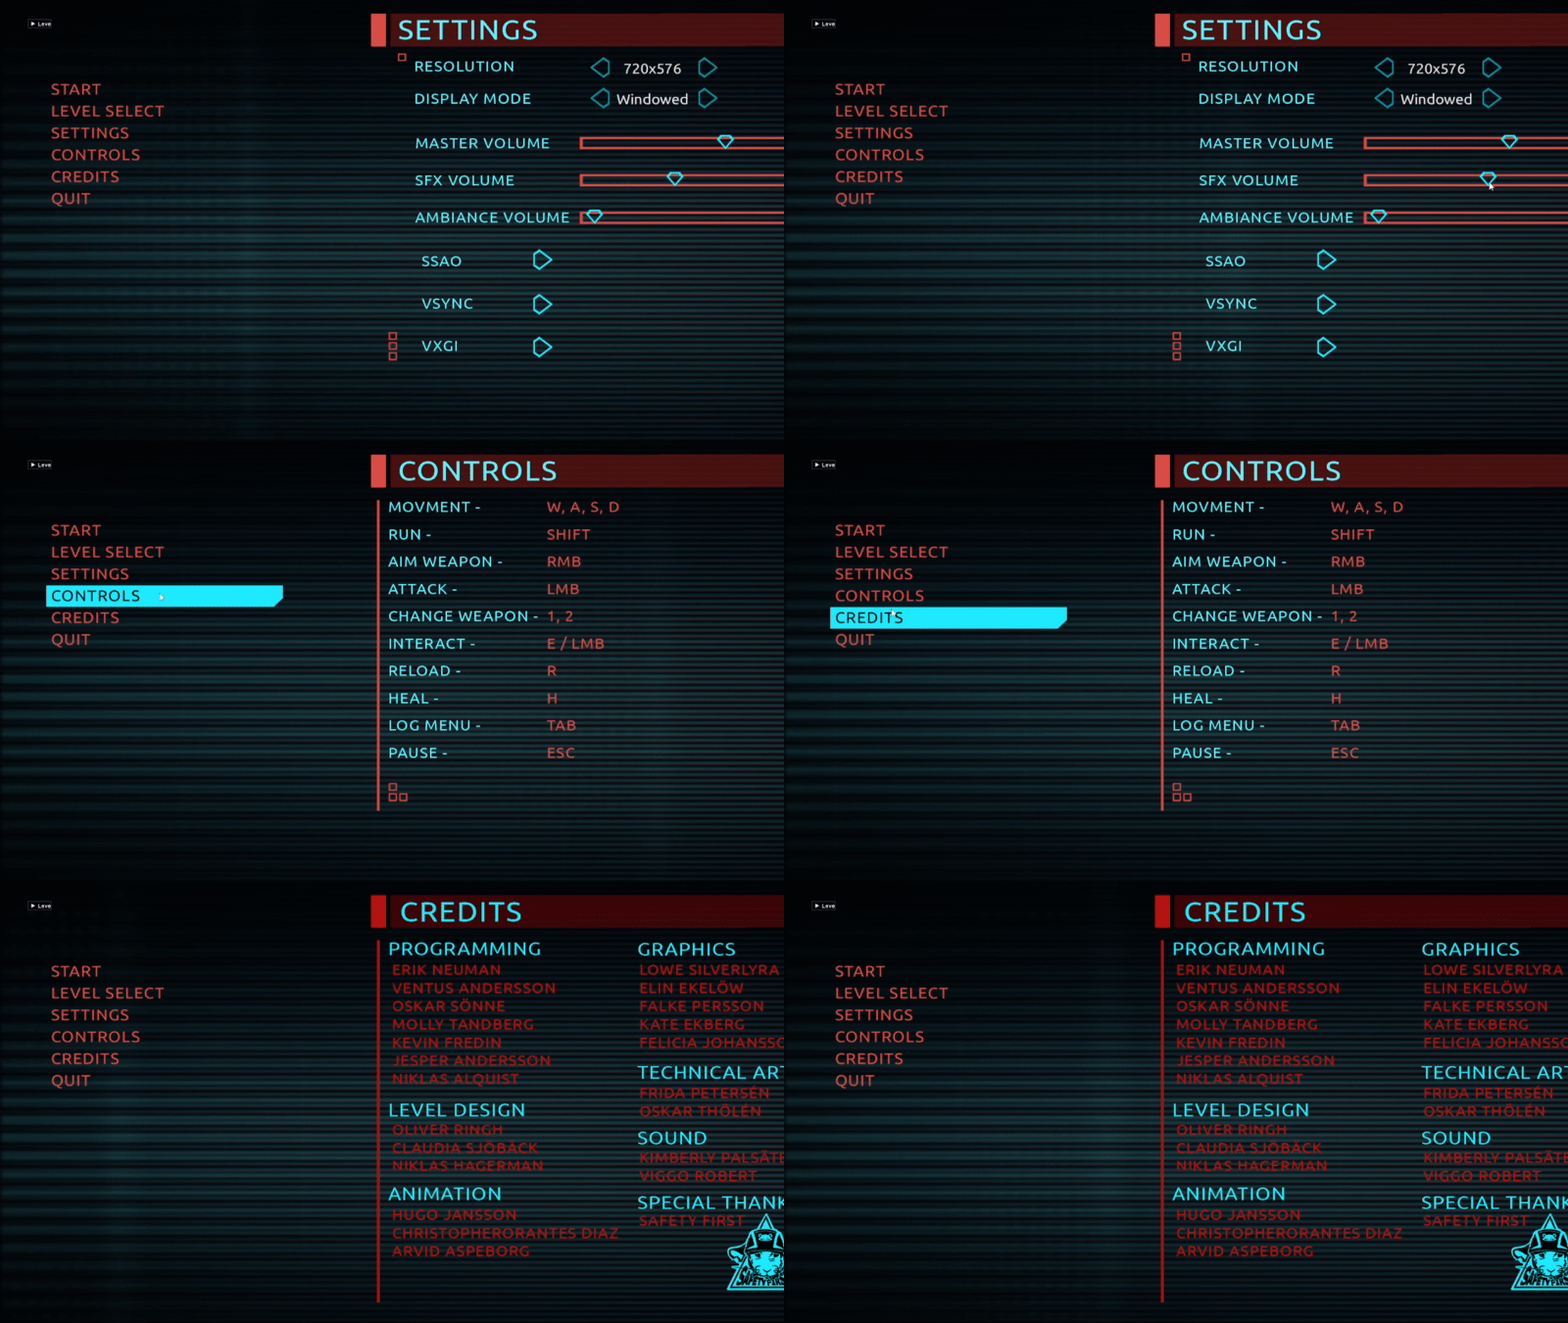
It was an interesting challenge to create shaders that were supposed to be in the background and not be seen too much, the menu shader itself had to be subtle and give a techy and cozy feel to navigating the menu. I am very happy with where it ended up. the shader itself is 3 different patterns that scroll differently and I also added some delay using these patterns to the time for it to morph and give a glitching screen effect.
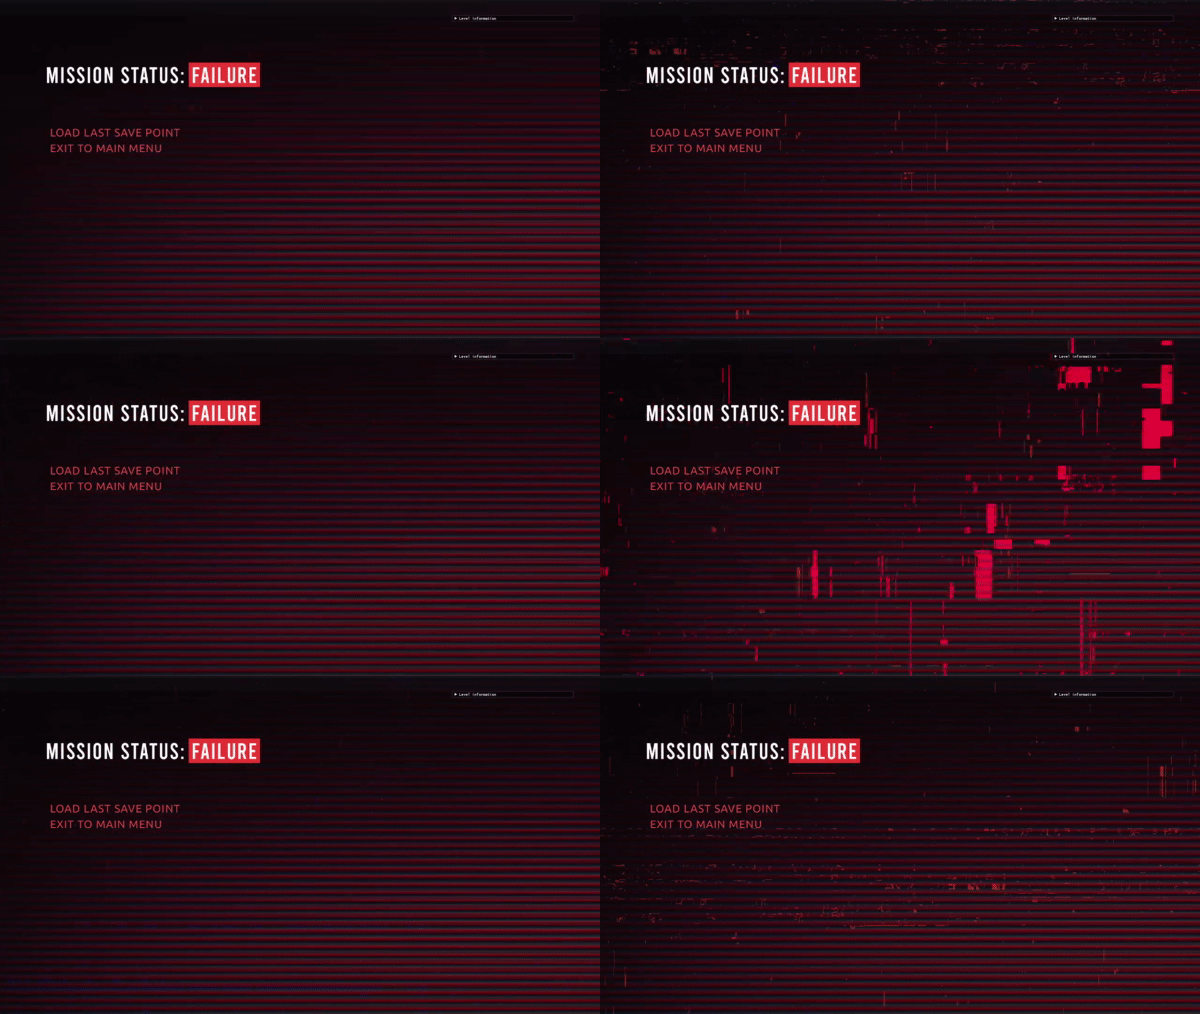
Our DeathScreen in particular was a fun and useful shader to create. For it, I created time cycles that had two parameters, one “cycle-time” which controls the length of a time cycle, and one”off-time” which controls for how long time during the cycle that each pattern should not be seen.
which gave a flashing effect that I had an immense amount of control over. this part of the shader was reused a lot during the project.
each pattern in the DeathScreen was also scrolling at high speeds to give a sense of randomness to where the glitch effects ended up on the screen.
- DeathScreen (Slide One)
- Menu Shader (Slide Two)
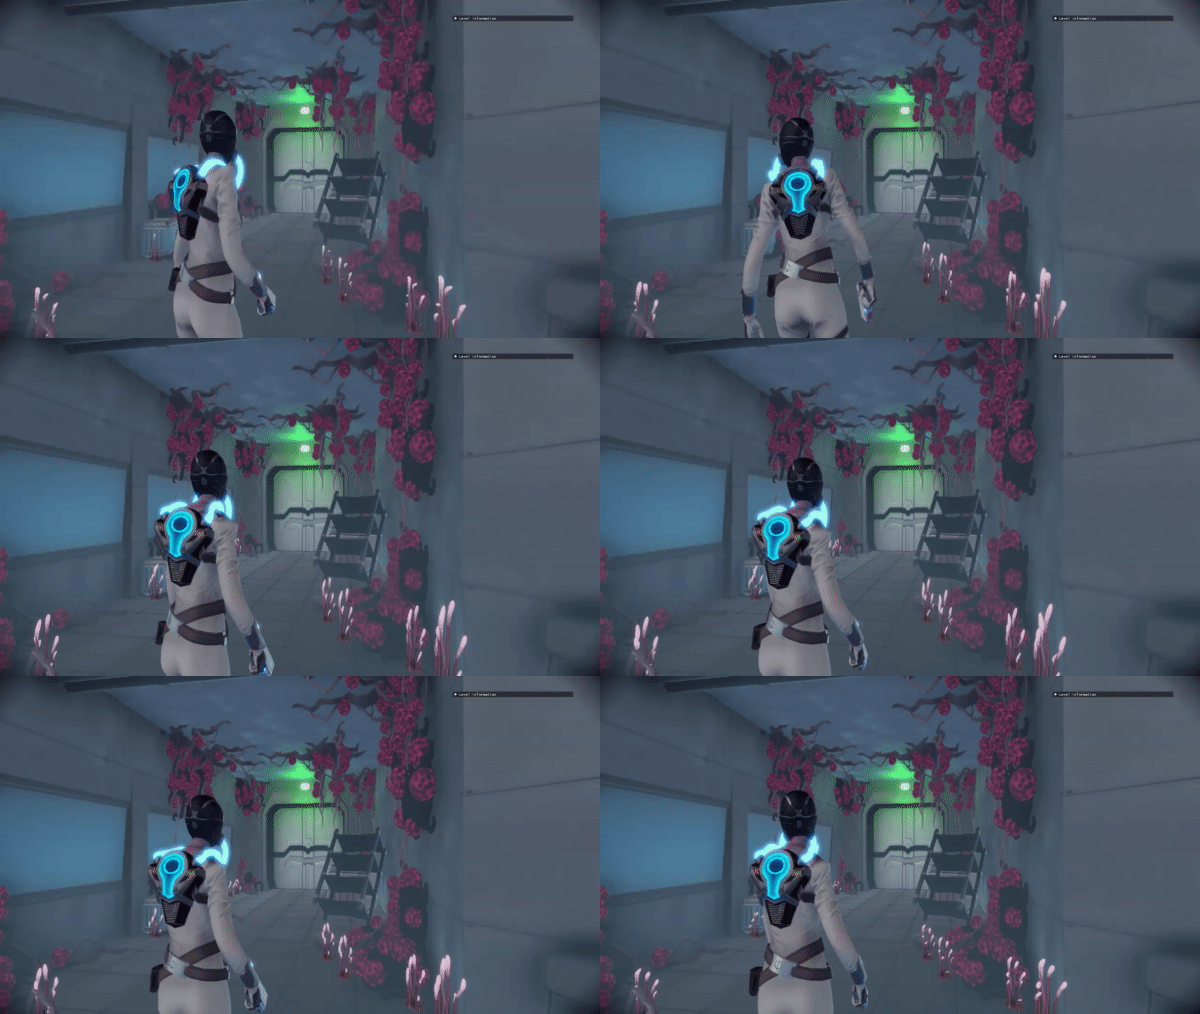
- Growth Movement In game (Slide one)
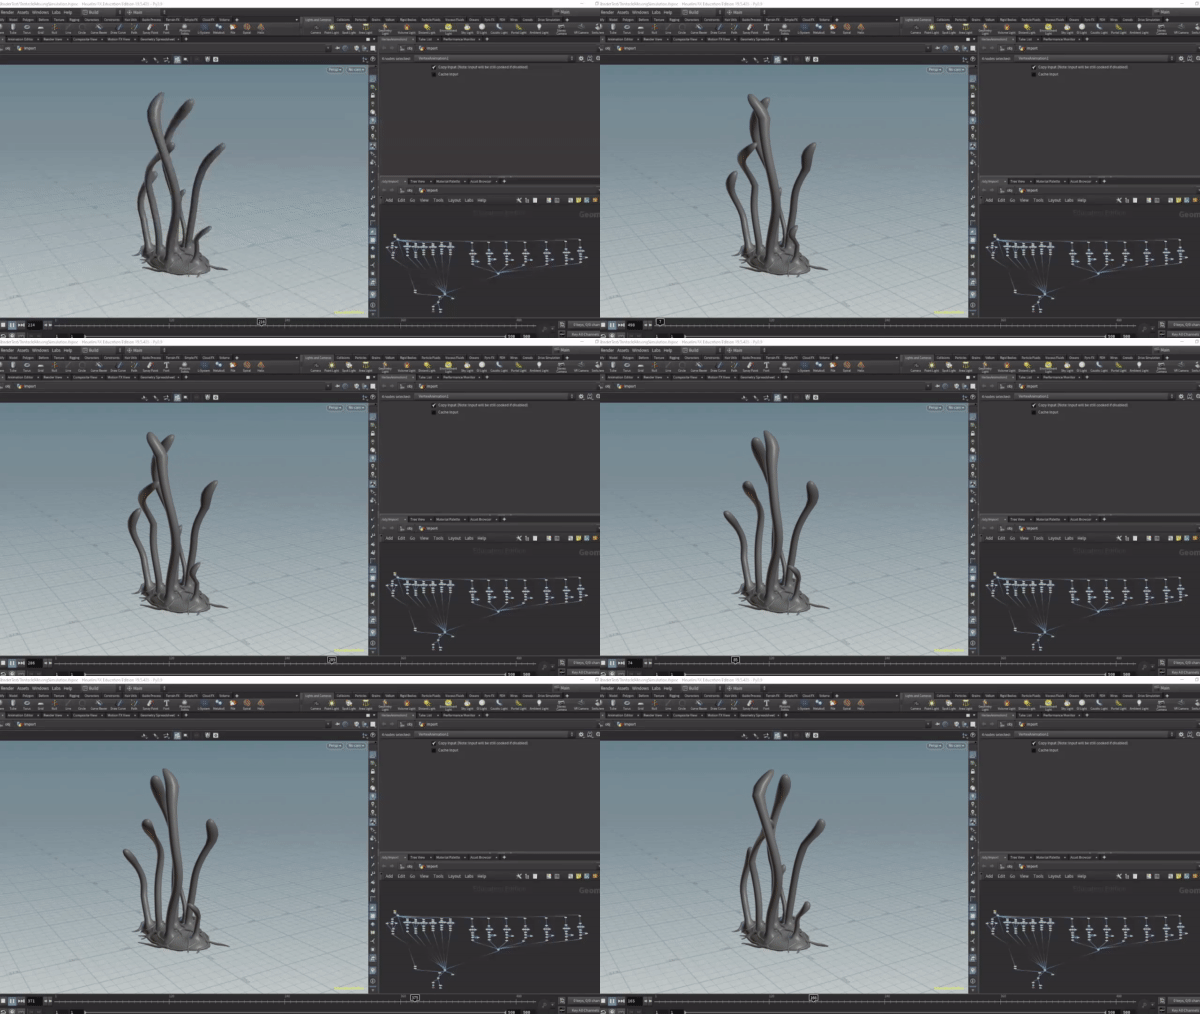
- Houdini Scene (Slide Two)
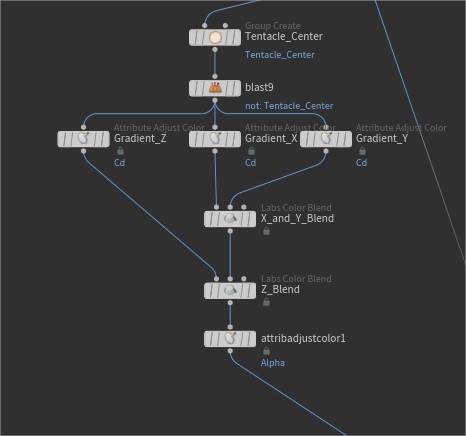
- Houdini Graph of one Tentacle (Slide Three)
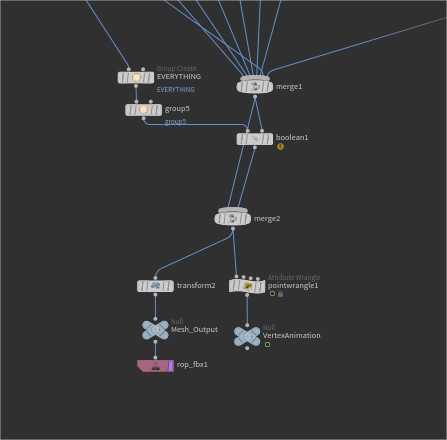
- Houdini Graph Merge (Slide Four)
For this project, I was in charge of making a vertex shader-based movement for one of our props, which is a tentacle-looking plant thing.
One key thing that I took from this is the value of good pre-production and preparing myself. Most of the time during pre-production went into understanding how to create this effect which in turn led to this being one of the easiest things I have ever implemented when our 3D artist was done with the model I had this working in the game within a few hours – something I expected to become a huge pain.
The shader itself is fairly simple, it’s a sine/cos-based movement based on time and I multiply this with vertex colors to have them wiggle in different directions. I morphed the time by multiplying the vertex color alpha gradient to break up the movement and get the desired effect.
For this, I decided to use Houdini as I could quickly iterate while vertex painting by testing it in Houdini with the point wrangler node and adding this behavior with simple code. I then grouped every tentacle and easily and non-destructively applied vertex colors to each – this must have more than doubled the speed It took to iterate and make changes and I have never before felt this much in control of a vertex shader’s outcome.
I then used the blast node to remove everything except for each moving part and merged them together as Houdini made copies of the model for each group, I then removed these from the base mesh with a Boolean operation which gave me all the parts that did not move isolated. which I merged with everything else. to then give me the finished model that was easily implemented into the game.
I may only have scratched the surface of Houdini but I can see how powerful this tool is, and I am for sure going to delve deeper into finding ways to improve my efficiency when creating VFX with Houdini.
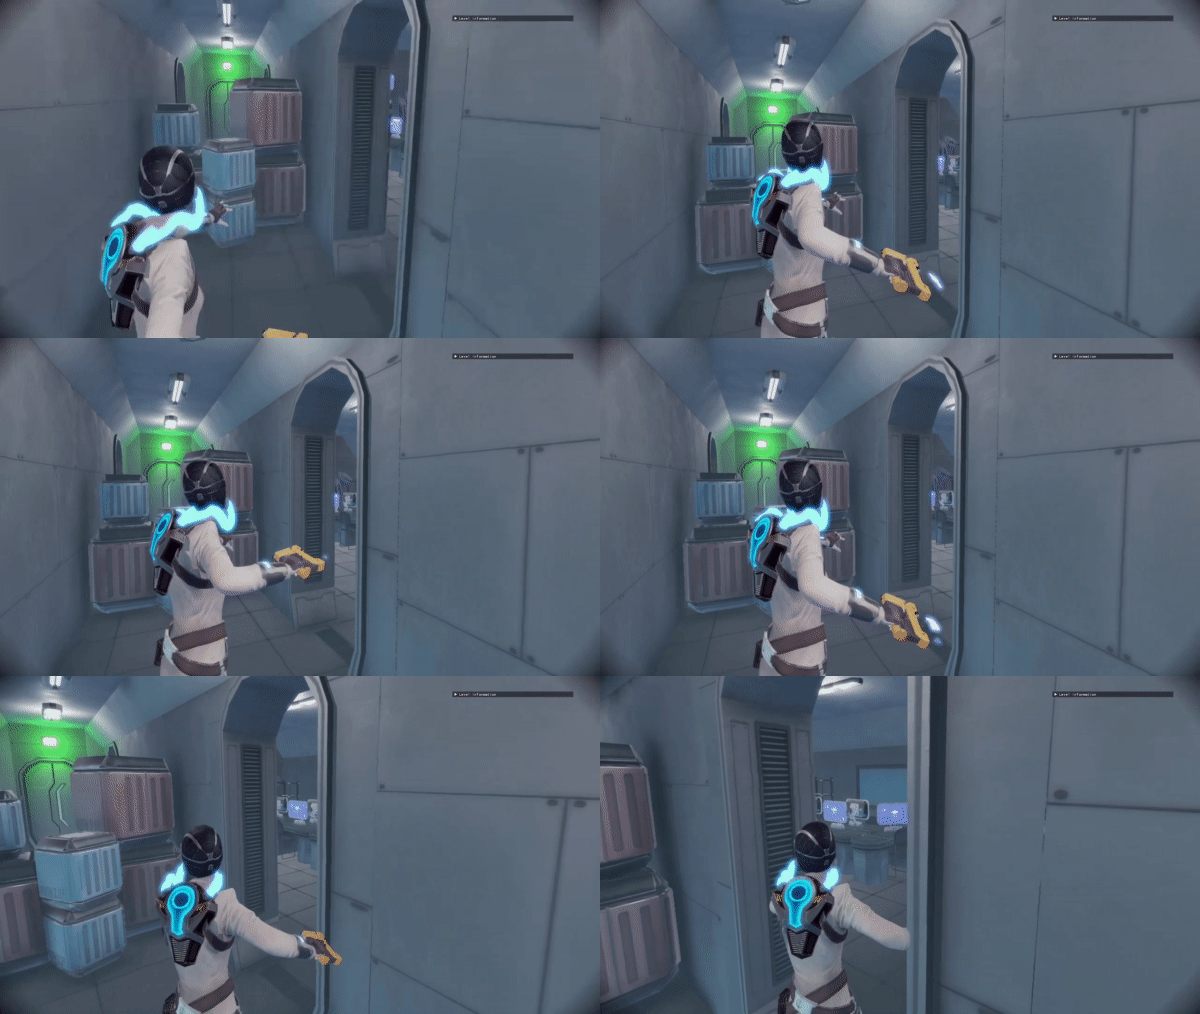
Well, our gun had to have feedback! this was my responsibility. The shaders themselves are fairly simple, animating the opacity and color for a blast effect using curves, I focused on clear and good-looking shapes.
The big challenge of this effect was in the implementation and HLSL conversion. a fairly simple curve drawn in Unreal engine is a completely different beast in HLSL and to get the effect I wanted I had to delve head-first into drawing curves with math… I know it’s horrible.
But after some RnD I managed to understand how to utilize “Desmos” to visualize the curves I wanted and I got some good control of the effects I was making.
Our programmers were struggling with getting the meshes in the right places in our engine. It is as easy as parenting to the player bone or to the vertex itself. However, I realized that the timer I utilized for the shooting effects which was a “time since action” only started when action had been called. so the meshes would have an opacity of 0 until that happened and therefore would be invisible. So I came up with the idea to add all the VFX meshes to the rig and just call them when activated, and it worked! It also gave me the possibility to have parts of the shaders run on normal runtime in order to give variety. for example, the noise texture distorting the smoke runs at all times, which means it gets slightly different distortion for each shot.
- Shooting VFX (Slide One)
- Tazer VFX (Slide Two)
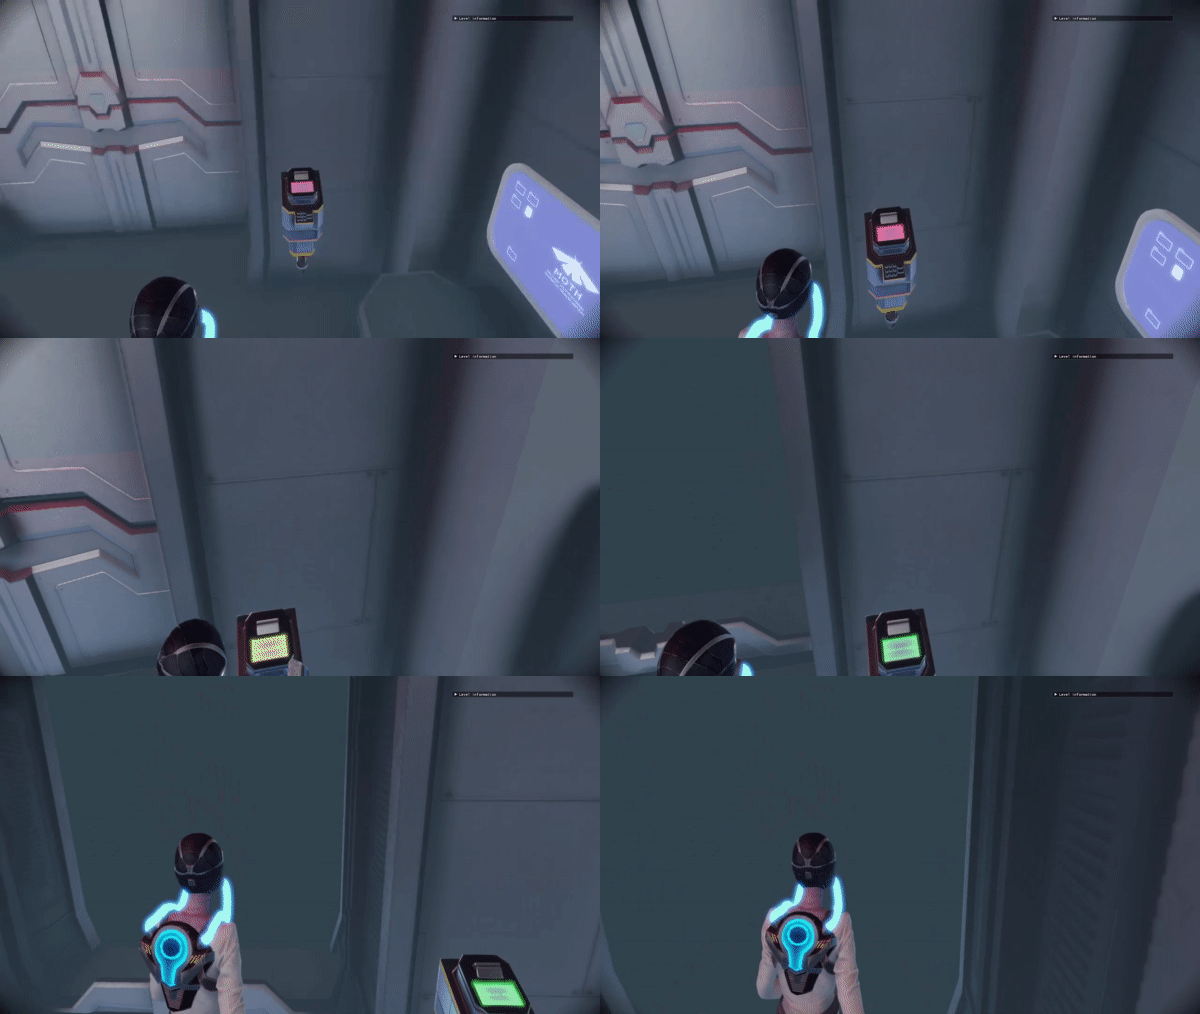
- Card Reader Open (Slide One)
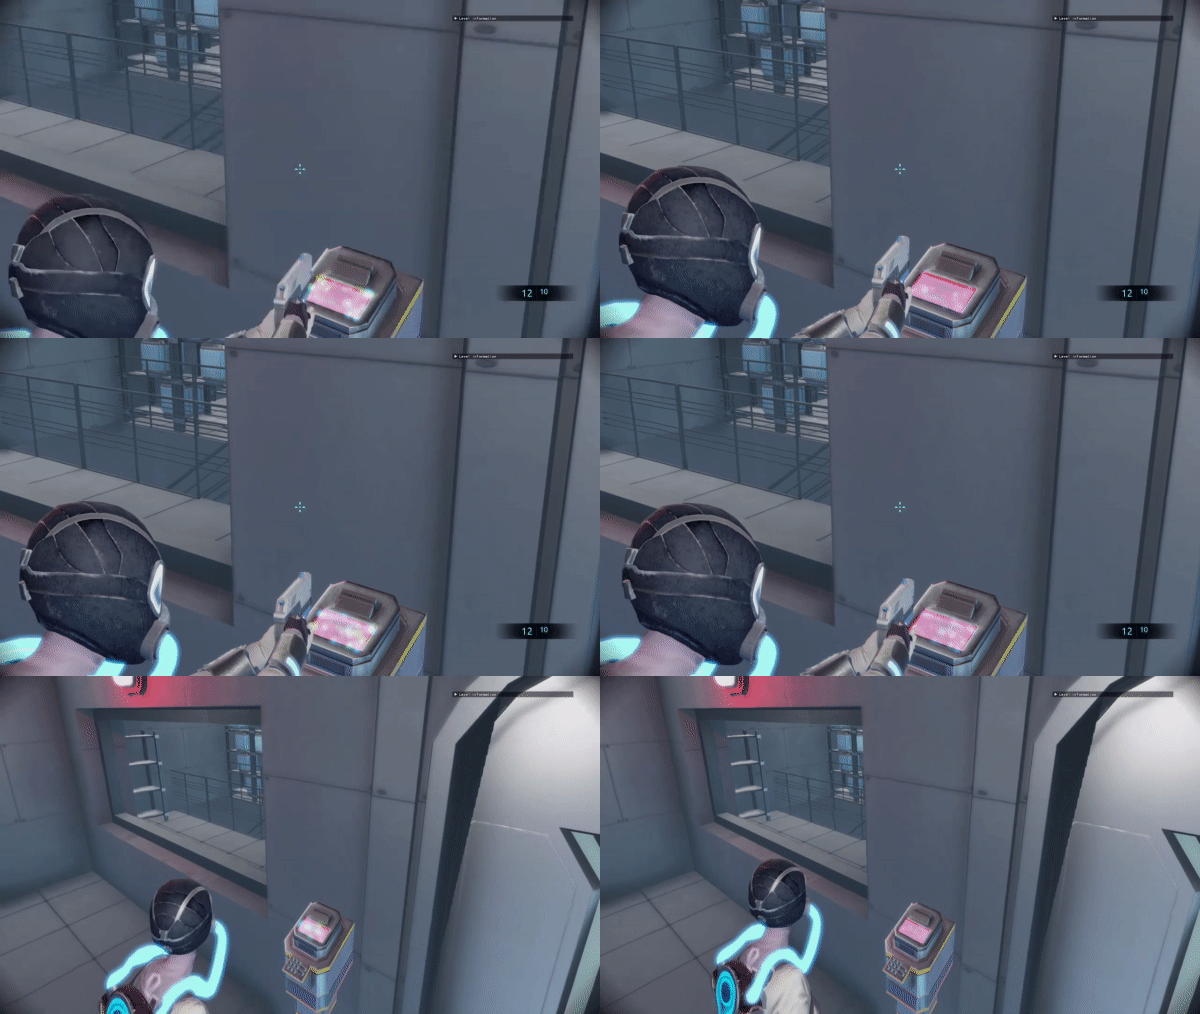
- Card Reader Broken (Slide Two)
We had card readers in the game which required a keycard to open. These had to have a shader that starts off in an “Acces Denied” state and then switched to an “Unlocked” state when interacted with.
This shader was fairly simple I utilized the “Times Since Action” timer I had access to in an alpha of a Lerp where I had the two different states that I made textures for using Substance Designer. I made sure the timer stayed at one when it reached it so it would continue displaying “Unlocked” and that it wouldn’t reach crazy numbers.
I combined this with a green flash to cover for the transition that I drew up a curve for with the help of Desmos and it also got activated with the same timer.
I made a separate version for the broken card readers that we have which has a different version of the glitch effect from the death screen, Since these where supposed to be opened with the Tazer I also made a spark/Lightning effect for it so that the player can connect the broken card reader to the Tazer and figure that out. however it has not made it into the game yet.
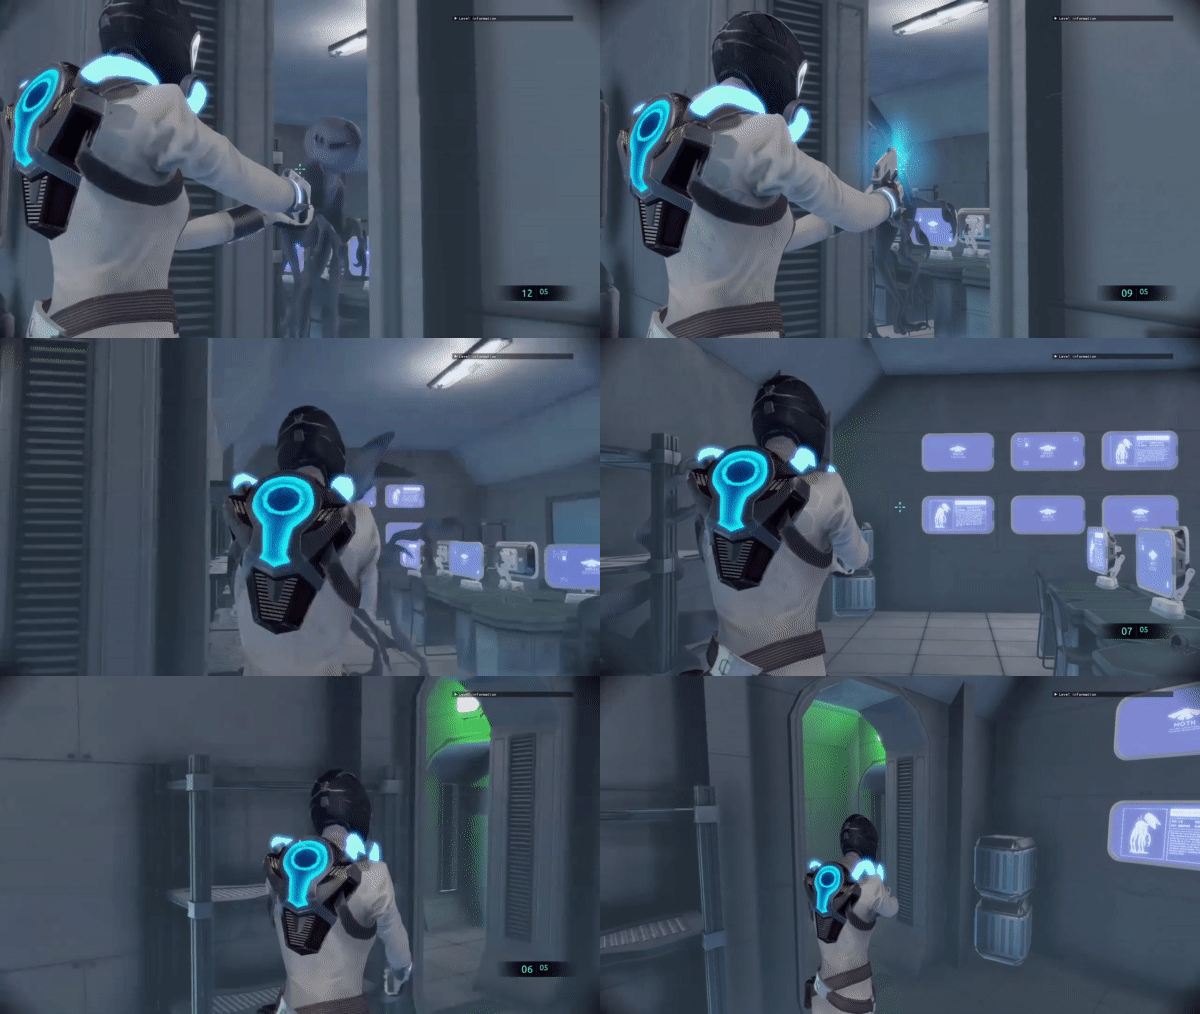
The screens use a combination of much of the things that you read about above, some patterns scrolling, some flickering with the time cycles to give some subtle motion to the screens.
We had one problem when a shader was applied I could either choose to have the screen transparent, or I could choose to have it rendered without any sort of glow. both did not feel very nice, so we solved this in an equally simple way we put a copy of the screen mesh behind the screens. this actually was really helpful as it gave me an additional way to control the screen by changing the color of that mesh I got varied amounts of a glow because of how it blended with the background. which has been very useful to get this shader the way I want after each change to the light that happened during the project.
-
-
- A room full of screens
-
